A hot tub is a sanctuary of relaxation and rejuvenation, but to ensure a clean and enjoyable experience, proper maintenance is crucial. One essential aspect of hot tub maintenance is cleaning the filters. Hot tub filters are responsible for trapping debris, contaminants, and oils, keeping your water clean and safe. Regular cleaning of hot tub filters is essential to maintain their efficiency and prolong their lifespan. In this comprehensive guide, we’ll walk you through a step-by-step process on how to clean hot tub filters effectively. So, grab your cleaning supplies and let’s dive in!
Cleaning Hot Tub Filters
Step 1: Gather Your Supplies
Before starting the cleaning process, make sure you have the following supplies on hand:
- Filter Cleaning Solution: Choose a filter cleaning solution specifically designed for hot tub filters. Avoid using household cleaners or detergents as they may damage the filter media.
- Bucket: Use a clean bucket large enough to accommodate the filter(s) being cleaned.
- Garden Hose: You’ll need a garden hose with a spray nozzle attachment for rinsing the filters.
- Protective Gloves: Protect your hands from chemicals and debris by wearing a pair of protective gloves.
- Soft Brush: A soft-bristled brush can be helpful for scrubbing away stubborn debris or buildup on the filter.
- Towels: Keep a stack of towels nearby to dry the filters after cleaning.
Step 2: Turn Off the Hot Tub
For safety reasons, turn off the hot tub and ensure that the power supply is disconnected. This step prevents accidental activation of the pump while working on the filters.
Step 3: Remove the Filters
Most hot tub filters are easily accessible and can be removed by following these steps:
- Consult the Owner’s Manual: Refer to your hot tub’s owner’s manual for specific instructions on how to remove the filters. Different hot tub models may have variations in filter placement and removal techniques.
- Open the Filter Compartment: Locate the filter compartment, typically located near the water intake area. Open the compartment cover or remove any clips or fasteners securing the filters in place.
- Take Out the Filters: Carefully remove the filters from their housing. Pay attention to their orientation for easy reinstallation later.
Step 4: Pre-Rinse the Filters
Before applying the filter cleaning solution, give the filters a thorough pre-rinse to remove loose debris and dirt. Follow these steps:
- Use a garden hose with a spray nozzle attachment to rinse the filters from top to bottom. Start with a gentle spray and gradually increase the water pressure to dislodge debris.
- Pay attention to the pleats of the filters, as this is where most debris accumulates. Direct the water flow between the pleats to remove trapped particles effectively.
Step 5: Apply Filter Cleaning Solution
Now that the filters are pre-rinsed, it’s time to apply the filter cleaning solution. Follow these steps:
- Fill a clean bucket with water and add the recommended amount of filter cleaning solution as per the product instructions. Ensure the solution is thoroughly mixed.
- Submerge the filters in the bucket, making sure they are fully immersed in the cleaning solution. Allow the filters to soak for the recommended duration, usually 1 to 2 hours. This allows the solution to break down oils, contaminants, and scale buildup.
Step 6: Scrub the Filters
After the soaking period, use a soft brush to gently scrub the filters, paying attention to the pleats and hard-to-reach areas. This step helps dislodge any remaining debris and ensures a thorough cleaning. Be careful not to use excessive force or harsh scrubbing, as this can damage the filter media.
Step 7: Rinse the Filters
Once you have thoroughly scrubbed the filters, it’s time to rinse off the cleaning solution. Follow these steps:
- Use a garden hose with a spray nozzle attachment to rinse the filters from top to bottom. Ensure that the water pressure is strong enough to remove any residue from the cleaning solution.
- Continue rinsing until the water runs clear and free from any traces of the cleaning solution. Pay close attention to the pleats and ensure that all debris and soap residue are completely removed.
Step 8: Inspect and Dry the Filters
After rinsing, inspect the filters for any signs of damage, tears, or wear. If you notice any issues, it may be time to replace the filters. Once you are satisfied with their condition, follow these steps to dry the filters:
- Gently shake off excess water from the filters.
- Place the filters on clean towels or a drying rack in a well-ventilated area. Ensure they are placed in an upright position to allow proper airflow and drying.
- Allow the filters to air dry completely before reinstalling them. This usually takes 24 to 48 hours, depending on the humidity levels.
Step 9: Reinstall the Filters
Once the filters are completely dry, it’s time to reinstall them in the hot tub. Follow these steps:
- Refer to your hot tub’s owner’s manual for specific instructions on how to properly reinstall the filters. Pay attention to the correct orientation and placement of the filters.
- Place the filters back into their housing, ensuring a secure fit. Close the filter compartment cover or fasten any clips or fasteners to secure the filters in place.
Step 10: Regular Filter Maintenance
To keep your hot tub filters in optimal condition and prolong their lifespan, follow these maintenance tips:
- Regular Cleaning Schedule: Create a cleaning schedule based on the usage of your hot tub. As a general rule of thumb, clean the filters every 2 to 4 weeks to maintain their efficiency.
- Deep Cleaning: Perform a deep cleaning of the filters regularly. This involves following the complete cleaning process outlined in this guide, including soaking the filters in a filter cleaning solution.
- Water Chemistry: Properly balance the water chemistry of your hot tub. Maintain appropriate sanitizer levels and regularly monitor pH, alkalinity, and calcium hardness. Balanced water chemistry reduces the strain on the filters and extends their lifespan.
- Regular Inspection: Routinely inspect the filters for signs of wear, damage, or reduced performance. If you notice any issues, replace the filters promptly to ensure optimal filtration.
Hot Tub Filter Cartridges for Inflatable Hot Tubs
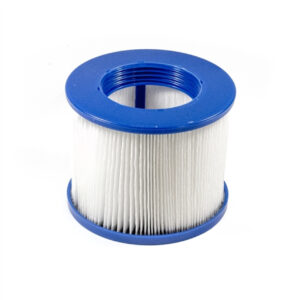
If you own an inflatable hot tub, you may be wondering about the specific considerations when it comes to finding the best way to clean hot tub filter cartridges. Inflatable hot tubs have their own unique characteristics and requirements. Here’s what you need to know about hot tub filter cartridges for inflatable hot tubs:
- Compatibility: When purchasing replacement filter cartridges for your inflatable hot tub, ensure that they are compatible with your specific model. Different inflatable hot tub brands and models may require specific filter sizes or types. Refer to your hot tub’s owner’s manual or contact the manufacturer to determine the correct filter cartridge specifications.
- Size and Dimensions: Inflatable hot tubs often have smaller filter compartments compared to traditional hot tubs. As a result, the filter cartridges used in inflatable hot tubs are typically smaller in size. When purchasing replacement cartridges, ensure they fit properly within the filter compartment to ensure efficient filtration.
- Filter Media and Filtration Efficiency: The filter media used in cartridges for inflatable hot tubs is designed to effectively capture debris and contaminants while maintaining optimal water flow. Look for filter cartridges that offer high filtration efficiency, ensuring that even the smallest particles are trapped.
- Easy Replacement: Inflatable hot tubs are designed for convenience and portability, and this should extend to the replacement of filter cartridges. Look for cartridges that are easy to install and remove, allowing for quick and hassle-free maintenance.
- Pack Quantity: Consider the number of filter cartridges included in a pack. It’s recommended to have spare cartridges on hand for regular replacements. Having extras ensures that you can continue to enjoy clean and filtered water while one cartridge is being cleaned or replaced.
- Filter Lifespan and Replacement Schedule: The lifespan of filter cartridges for inflatable hot tubs may be shorter compared to traditional hot tubs due to the smaller size and filtration capacity. It’s important to follow a regular cleaning and replacement schedule to ensure optimal filtration and water quality. Refer to the manufacturer’s guidelines for the recommended replacement interval.
Remember, proper maintenance and regular cleaning of filter cartridges are essential to maintain the water quality and longevity of your inflatable hot tub. By using compatible filter cartridges and following the manufacturer’s recommendations, you can enjoy clean and refreshing water in your inflatable hot tub.
Wrapping Up
Cleaning your hot tub filters is an essential part of hot tub maintenance to ensure clean and healthy water for an enjoyable experience. By following this step-by-step guide, you can effectively clean your hot tub filters and keep them in optimal condition. Remember to maintain a regular cleaning schedule, use proper cleaning solutions, and follow the manufacturer’s guidelines for your specific hot tub model. With proper care and maintenance, your hot tub filters will continue to provide clean and sparkling water, allowing you to relax and unwind in your personal oasis. If you want to elevate your relaxation experience, check out our barrel saunas for sale—a perfect complement to your personal retreat right in your backyard.