Chain link fences present a smart solution for securing your yard at an affordable price when looking at different types of metal fencing. If you install them yourself, you can skip the contractors and cut costs even further.
But isn’t installing fences difficult?
It’s certainly no walk in the park. So, if you’re wondering how to do a chain link fence installation, you have come to the right place. While assembling your chain link gate or fence may take some effort, with a little know-how and perseverance, you’ll be able to finish your fence installation in no time. With this guide on how to install a chain link fence, you can erect one straight and stable without professional assistance.
What Do You Need For a Chain Link Fence?
Before you can erect your chain link fencing, you need materials. Before you can get materials, you need to know what to buy and how much of it. When answering the question, “How much fence do I need?” be sure to determine the following when measuring out your property lines:
- Measure – Take the dimensions of the area you want to enclose and total them in linear feet.
- Calculate materials – Chain link fence material comes in rolls, usually of 50 feet, so decide how much chain link fabric you’ll need for the fence line in your yard. Poles should be placed at a maximum distance of 10 feet apart, and chain link mesh can also be affixed to structures like houses and existing fences. Decide what type of and how much securing hardware you need to go along with your chain link fabric. Usually, you can buy your tension wire, chain link mesh, fence tie, and everything else you need as a pack at one place. ALEKO’s complete chain link fence kits come with all the necessary materials for installation.
- Take stock of equipment and other supplies – You’ll need some basic tools, such as a screwdriver, a level, and a shovel. Unless your backyard is made of solid rock, you’ll also need concrete to stabilize the posts in their holes. Different municipalities have varying regulations regarding residential chain link fence post hole dimensions, so the amount of concrete needed will depend on your location.
Once you have everything you need to start, set the alarm for the crack of dawn and get ready to dig.

The Chain Link Fence Installation Process
Installing a chain link fence can take a few days, depending on how large the area is and the equipment that you have. Renting an auger or post-hole digger can save bundles of time by allowing you to dig clean, straight holes much faster than you could with a shovel.
Whatever equipment you decide on, the process of putting up a chain link fence can be broken down into a few doable steps.
Step 1: Measure and Mark
The first step of your chain fence installation project is to trace out the line posts your fence will follow. Now, this is the first essential step whenever you install a metal fence of any kind. Remember to mark spots for your posts every ten feet. Using a roll of thread strung between stakes in the poles’ positions can help keep things in line. Otherwise, spray paint works well to mark where to dig.
You can even use a laser or other device to align the poles. Whatever method you use, just make sure to keep things straight.
Step 2: Dig
Get your shovel or auger into the dirt and take your fence post holes down to the width and depth your city’s code calls for.
You want the walls of each hole to be straight to prevent angled poles. Keep the best of the removed dirt close to each hole—you’ll be using it to fill in around the posts once they’re set in place.
Step 3: Put in the Poles
Ensuring that the poles are upright, level, and solid is essential to keeping your residential chain link fence standing for years to come. To make sure your line posts are secure:
- Mix up concrete – Once you have your posts in the right position, you need to quickly fill their gate post holes with concrete. Mix some up to the manufacturer’s instructions to have on hand and ready to go—just work quickly before it sets!
- Lower and level your line posts – Give the chain link fence post a firm drop into the hole and shimmy it back and forth until it’s even and at the right fence height for your selected mesh. Use a level to make sure it’s flat and a tape measure to keep it centered in the hole.
- Fill the hole – Keep the pole in place while gently filling the area around its base with concrete. Take the concrete up to about six inches from ground level. You can jiggle the pole around to remove air bubbles from the concrete; just make sure to realign it before it sets.
- Repeat and backfill – Install all your poles, then top the gate post holes off with dirt once the concrete sets.
Step 4: Install the Hardware and Affix the Top Rail
Put the tension bar fasteners on the end posts; then, put the other fasteners, connectors for the top rail, and end caps on all of them. If you’re going to affix part of your galvanized chain link fabric to a building or existing wall, ensure the connectors are securely attached and aligned.
Once everything is attached, and in a straight line, you can run the segments of the top rail between the posts.
Step 5: Run the Mesh
Weave a tension bar through the end row of squares of a roll of fence fabric. Securely fasten it to an end post using the connectors.
Run the mesh fence fabric from line post to line post, pulling it taught and fastening it tightly to each pole as you go. Help from a friend or special equipment can make this process significantly easier.When you get to the end of the roll, slip in the other tension rod and fasten it to the final post, and secure it with a fence tie. Repeat the whole process if your space requires more than a single roll of mesh.
If you have excess mesh at the end, trim it off and save it for the future. Make sure to twist and flatten any pointy bits sticking out afterward.
Step 6: Twist the Ties
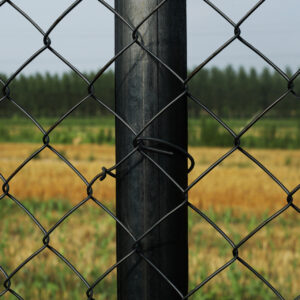
Secure the wire ties to the mesh every foot along vertical posts and every 24 inches along the top rail. Twist them tightly, bending the wire ties around themselves several times to keep the mesh fixed in place.
Once your final fence tie has been twisted, your fence is complete. You can sit back and admire a job well done and a home well secured.
Guard Your Yard With a Chain Link Fence from ALEKO
Now that you know how to put up a chain link fence, you’re probably wondering, “How much to install a chain link fence?” or “How much does a fence cost?”
The answer is: Not that much if you get your materials from ALEKO.
We have a variety of different styles available to suit your home and budget. Whether you want something short or tall, silver or black, as a set or in individual pieces, ALEKO has the materials for your chain link fencing needs. Once your fence is up, be sure to keep up with fence maintenance to ensure your unit lasts a long time.
Browse our selection of chain link fence kits to find the right one for your yard. You have the knowledge and skills to install your own fence, and ALEKO has the parts you need to get the job done.
And if you’re interested in other fence materials, check out our other metal fence panels and fencing kits today.
Sources:
Wisconsin Department of Transportation. Chain Link Fence. https://wisconsindot.gov/
Government of Canada. Installation of Chain Link Fence. https://publications.gc.ca/
US Embassy in South Sudan. Specification for chain link fence and gate. https://ss.usembassy.gov/

