A driveway gate isn’t just a functional addition to your home—it’s a statement piece that enhances curb appeal, adds security, and provides a clear boundary for your property. Whether you’re looking to install a wooden driveway gate for rustic charm or a metal gate for a sleek, modern look, this guide will walk you through the process from start to finish. Let’s roll up our sleeves and dive into the DIY driveway gate journey!
Choosing the Right Gate Material
Selecting the best material for your driveway gate depends on factors like durability, aesthetics, maintenance, and security needs. Wood gates offer a warm, traditional look that blends beautifully with natural landscapes. They can be customized with different stains and finishes, making them a versatile choice. However, wood requires regular maintenance to prevent warping, rot, and insect damage. On the other hand, metal gates, such as wrought iron, steel, or aluminum, provide superior durability and security. Wrought iron is a popular choice for its strength and intricate designs, while aluminum gates are lightweight and resistant to rust. Steel gates strike a balance between the two, offering durability without the high cost of wrought iron. Ultimately, your choice should reflect your home’s architectural style, climate conditions, and personal preference.
Step 1: Plan Your Driveway Gate Design
Before you start gathering materials, careful planning is essential. Consider the following:
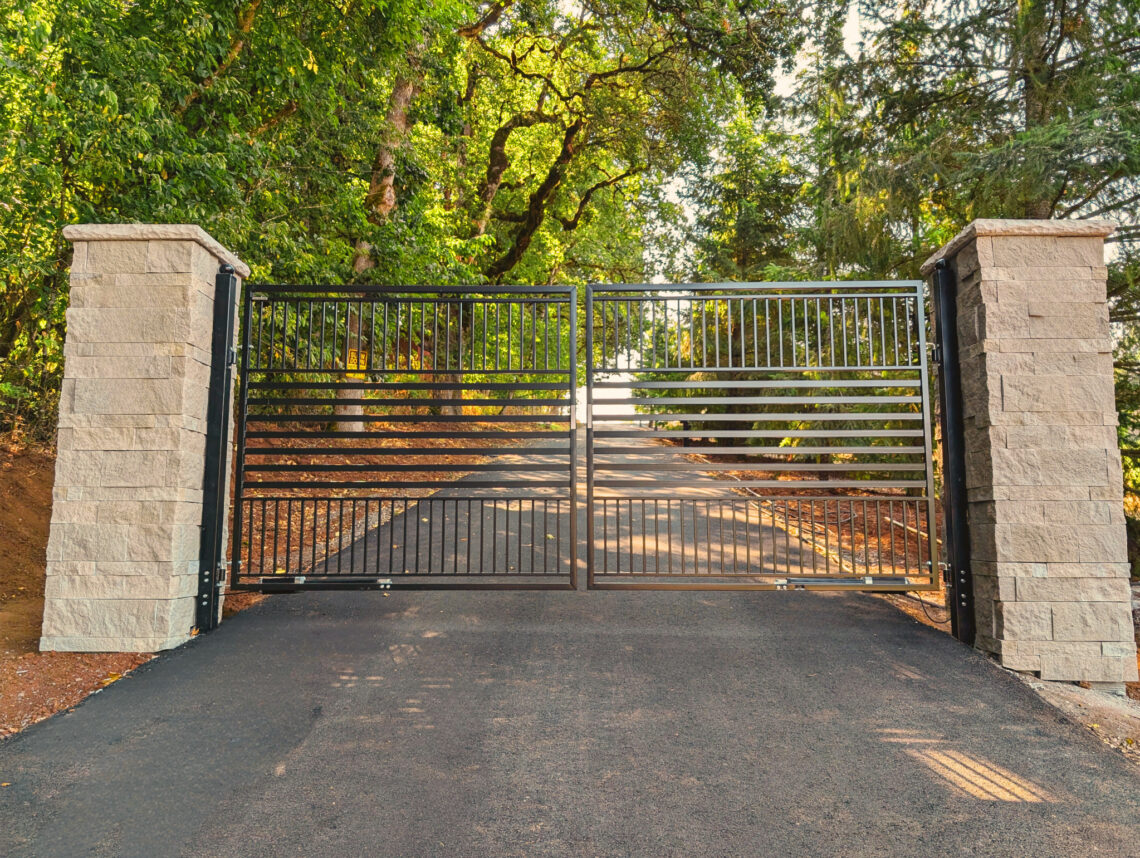
- Type of Gate: Do you prefer a swing gate or a sliding driveway gate? Swinging gates work well for larger driveways with ample clearance, while sliding gates are ideal for properties with limited space.
- Material: A wood gate offers a classic appeal, while wrought iron driveway gates provide durability and a more ornate look.
- Size & Height: Taller gates offer more privacy and security but may require additional structural support.
- Automation: If convenience is key, an automatic gate opener can make access effortless.
- Overall Aesthetic: Consider how the gate complements your fencing, exterior wall, and outdoor space for a cohesive look.
Step 2: Gather Your Materials and Tools
Once your design is finalized, it’s time to collect everything you’ll need. Your custom driveway gate may require:
Materials:
- Timber or metal panels for the gate frame
- Wood slats or fence panels for aesthetics
- Gate posts (treated wooden posts or metal)
- Hinges, gate lock, and gate hardware
- Concrete for securing fence posts
- Screws, bolts, and brackets
- Optional: Automated gate components if installing an electric gate opener
Tools:
- Measuring tape & level
- Power drill & saw
- Pilot hole drill bits
- Screwdriver
- Shovel & post hole digger
- Cement mixer (or a sturdy wheelbarrow for manual mixing)
- Wrench and pliers for securing gate hardware
Step 3: Install the Gate Posts
The strength of your driveway gate starts with properly installed gate posts. Follow these steps for a secure foundation:
- Dig post holes about 24–36 inches deep and 12 inches wide, ensuring they are below the frost line.
- Pour concrete into each hole, setting the wooden posts or metal fence posts into place.
- Use a level to ensure they are straight, then allow the concrete to cure for 24–48 hours.
- For double gates, make sure both posts are aligned perfectly to prevent operational issues later.
Step 4: Build and Install the Gate Frame
Once the gate posts are set, it’s time to assemble and install the gate using a high-quality gate kit and hardware.
- Assemble the Gate Frame: Use a gate frame kit for precise alignment and sturdy construction.
- Attach Wood or Metal Panels: Select wood slats or metal panels and secure them using screws and brackets.
- Install Hinges and Latches: Durable gate hinges and latches ensure a smooth and reliable operation.
- Consider an Automated Gate System: If you prefer a modern touch, install an automatic driveway gate kit for hands-free entry.
Step 5: Secure and Adjust the Gate
- Ensure Proper Alignment: Use a level to make sure your gate hangs straight and swings or slides smoothly.
- Reinforce with Necessary Gate Accessories Use heavy-duty brackets and reinforcements to maintain structural integrity.
- Lubricate Hinges and Moving Parts: Prevent rust and wear by applying a protective coating to hinges and tracks.
Step 6: Install an Automatic Gate Opener (Optional)
For added convenience and security, consider installing an automatic gate opener. These systems are designed to work seamlessly with swing gates and sliding gates. Follow these steps:
- Mount the Opener System: Attach the opener to the gate frame and posts using installation hardware.
- Connect the Power Source: Choose between a wired electric power supply or a solar-powered gate opener for energy efficiency.
- Program Remote Controls: Follow the instructions to set up your remote and access features such as auto-close and security lock.

Step 7: Finishing Touches
To protect your new driveway gate, apply:
- Wood stain or sealant for weather protection
- Paint for metal gates to prevent rust
- Decorative elements like house numbers or custom designs for an extra touch
- Install solar-powered lighting for added security and nighttime visibility.
Maintenance & Long-Term Care
To ensure your driveway gate remains functional and aesthetically pleasing for years to come, follow these essential maintenance tips:
- Regular Inspections: Conduct routine checks on hinges, gate hardware, and supporting structures to catch signs of wear or damage early.
- Lubrication: Apply a silicone-based lubricant to hinges, tracks, and moving parts to prevent squeaking, rust, and premature wear.
- Seal and Protect: If you have a wooden gate, reapply a high-quality weatherproof sealant or stain at least once a year to protect against moisture and UV damage. For metal gates, use rust-resistant paint or coatings to prevent corrosion.
- Gate Opener Maintenance: If your gate is automated, check the sensors, power source, and remote controls regularly. Replace batteries as needed and keep the system clean from dirt and debris.
- Track and Roller Care: If you have a sliding driveway gate, keep the track clear of leaves, mud, and small rocks. Periodically inspect the rollers and replace them if they show signs of deterioration.
- Reinforce Fasteners: Tighten any loose screws, bolts, or brackets that may have become loose due to weather changes or frequent use.
- Adjust Alignment: Gates can sag or shift over time. Make sure your gate remains level and properly aligned by adjusting hinges or tightening support brackets.
- Winter Protection: In colder climates, keep the gate’s moving parts free from ice buildup. Use a de-icer on metal tracks or lubricate components to prevent freezing.
- Security Enhancements: Upgrade your gate latch or locking mechanism for enhanced security. Adding motion sensor lights near your gate can also increase visibility and deter trespassers.
Final Thoughts
Building your own driveway gate is a rewarding project that boosts your property’s curb appeal, security, and functionality. Whether you opt for a wooden driveway gate, a metal gate, or an automated gate, the key lies in careful planning, quality materials, and precise installation.
With the right tools, a bit of patience, and ALEKO’s premium gate installation products, your driveway gate project will be a success. For top-notch gate installation kits, automatic gate openers, and accessories, visit ALEKO today. Happy building!